Make That Dress Sew Cool!

If you can’t find what you’re looking for, create it yourself! Sometimes I think of outfits in my head, but can never seem to find quite what I’m looking for…but I come close! I’ve always loved shirtdresses. They have that vintage vibe that I love, they are fun and casual.
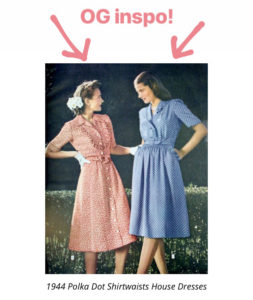
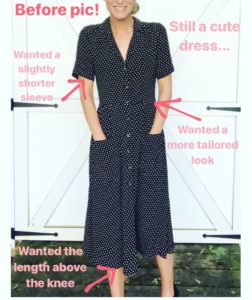
They were first introduced back in the 1940’s as a “shirtwaist dress”, achieving that name from combining a blouse top and a skirt bottom into one dress…genius! They look so good on every body type and this style has remained popular through today. I only have one other shirtdress I’ve had since college, but I’ve worn it so much it’s just seen better days. So, I’ve been wanting a new, inexpensive, casual shirtdress, preferably black in color (with some type of a print on it), tailored precisely to my body, that falls above my knee, that is easy to move around in, oh…and pockets would be great too. Not asking too much right?!?! I was browsing through Urban Outfitters one afternoon and came across this super cute polka dot number.
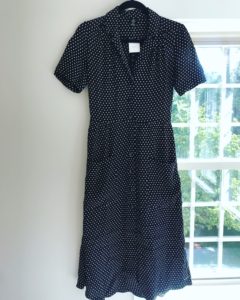

It had so much I was looking for, but not everything. It was a midi length – falling to my mid calves, a bit looser and not as tailored as I like… But! It was on clearance for $19.99 and in my size! I grabbed it because I had a vision, and I knew I had my trusty Singer sewing machine waiting for me at home.
Once I had a free moment to try on my dress at home, I took a few measurements and started to just quickly pin how I wanted the dress to fit my body.

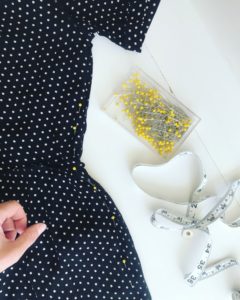
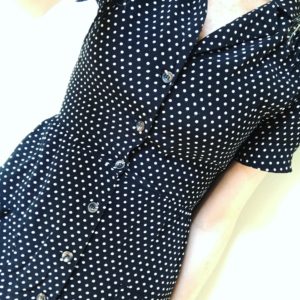
A good length for me was about 18” from the waist in the front, and 19” from the waist in the back . I have a little bit of a booty and didn’t want the backside too short. I also took the side seams in about 1” each side for that tailored look. Lastly, I took the sleeves up an inch as well, to give them just a bit shorter look.

Once it was all pinned, I tried it on again – to be extra sure it all looked okay – because you always measure twice and cut once. It was a go!
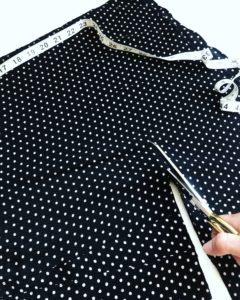
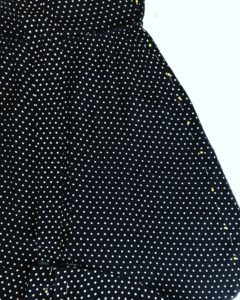
Time to cut. I took my pins out just on the skirt length portion, laid the dress flat, and started cutting the extra fabric off the length. I always feel it’s a good idea to keep that extra fabric around; maybe use it as a belt or sash, or even a hairband.

Once that cutting was done, I re-pinned the skirt length more accurately, 18” from waist in the front and 19” from waist in the back. The sides were already all set since I didn’t need to remove those pins to cut my fabric. Once all my pins were in place, I ironed the skirt seam and sleeves seam to help the material lay flat and sew more nicely.
Alright, time to sew!
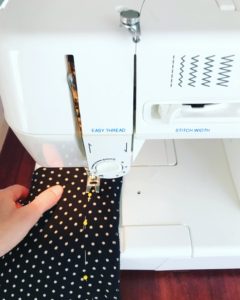
The actual sewing part took maybe 20 minutes. Just feed the fabric through the machine. Now, you don’t have to be an expert with a sewing machine here. I am by no means a professional in this arena. You can even borrow a sewing machine from a friend if you don’t have one. What I am doing here is the most basic type of sewing. I started with the side seams first, then my skirt length seam, finishing with the little sleeve seam.
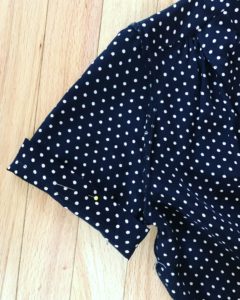
Aaaaand drumroll…fashion show time! I tried the dress on and played around with a few different accessories, including cherry red lips.

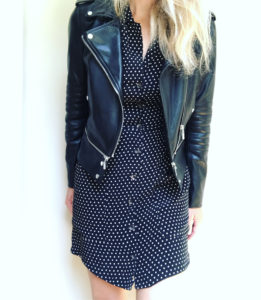

Hey, for 20 bucks, and a little bit of time and effort (maybe an hour total), I got that look I had envisioned. If you can’t find what your looking for, create it yourself!
I’m grateful for my mom and grandmother who sew amazingly, and thankful I picked up a few key sewing points from them! It helps our whole family!
4 Comments
Raeanne Brazee
Wow! Love this!!!
This Grateful Girl
Oh thank you!! Glad you like it!!
Amanda
So cute!!!
This Grateful Girl
Thanks Amanda!!