Wreaths that SLEIGH all day.

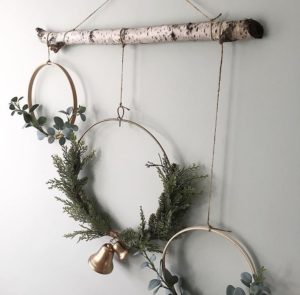
Hello friends! You literally just finished your Thanksgiving meal, and the holiday season is now in full swing. And why not? I always feel there is so much positivity and great memories that surround the holidays. So I say embrace it! In case you haven’t noticed, I have a little obsession with wreathing. Holiday wreaths have always been one of my favorite Christmas decorations ever since I was a little girl. There are so many looks and styles out there, you can really get creative with it all. They can be whimsical or traditional, lavish or modest. I’ve always been inspired by these minimalist hoop wreaths, and think they are just so beautiful – clean and simple.
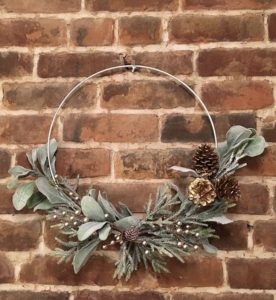
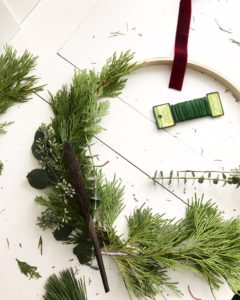
However, I am feeling very inspired lately to create more lavish and fuller looking wreaths – in a modest way, of course. I just recently made this one…

All the fresh greens you can mix up just add so much to the whole look. I ended up using a grapevine wreath base for this one. My absolute favorite greens are fresh eucalyptus and evergreens. And the smell of it all is heavenly, sooooo good! Then add a few embellishments, maybe a bow…and voila!
Just for fun, to see how my vision has evolved over the years, keep reading on to learn about my first handmade holiday wreath. These step by step instructions are a great base to start with when beginning to create your own wreath. Just add any extra looks you would like that particular season – whatever moves you! I bet you even have some fun embellishments already at home, in your holiday decor boxes. Back in 2018, I had my mind set on a certain asymmetrical look, so I got to work.

Here’s what I did…
Gather Materials
I took a trip to Michaels craft store and bought a wooden quilting hoop. This one is an 18”. It originally cost $3.49, but I had a coupon for 30% off – even better! You can also buy the grapevine wreaths there if you’d like that. They range in price from $4.99-$15.99 depending on size. Michaels also always has a sale going on.
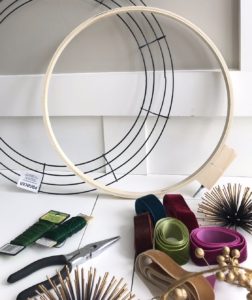
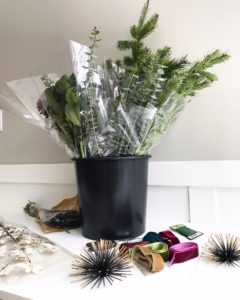
I already had some green floral wire and wire clippers at home, so I went to Trader Joe’s for my greens and florals. Trader Joe’s has the BEST selection of greens for the BEST price. Plus, they are always so nice and friendly there. I bought a bundle of winter greens ($4.99!), eucalyptus, of course ($2.99!), and a bundle of dried flower bundles ($2.99!).


I kept them all (except for the dried bundle) in a bucket filled with a little water for the night until I had time the next day to start my wreath assembly.
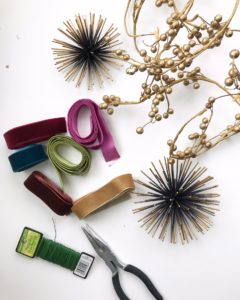
I gathered a few more items I had at home, which I thought might add some nice embellishments. I had a bunch of velvet ribbon, a few gold metal starbursts (that are actually wall hangings I got at Target!), and some gold berry garlands I bought from The Christmas Tree Shops a few years back.
Get Started!
It’s ok to make a mess, in fact I encourage it. Spread everything out so you can see everything right in front of you. You might get a little sticky from the sap, so feel free to wear gloves or an apron if you want to be careful.

Next, something I find helpful, is to just quickly lay out some of the greens you’d like to use, quickly play around with placement a little bit.
Once you have your layout idea, start clipping!
It’s Go Time!
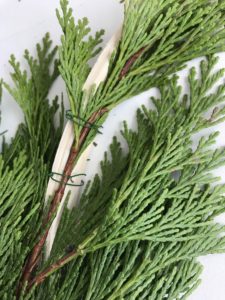
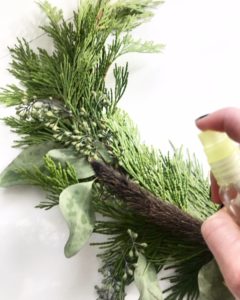
For this wreath, I kept the clippings small, just worked with one single clipped branch at a time. That way, I could place each green exactly where I wanted it, especially around such a thin hoop frame.

I cut about 5” of floral wire off and slowly began fastening my greens to my wooden hoop. Very simple – all I did was twist the wire around twice, and then wrap the remaining wire around the rest of the hoop.
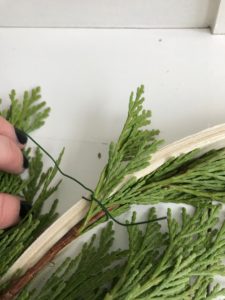
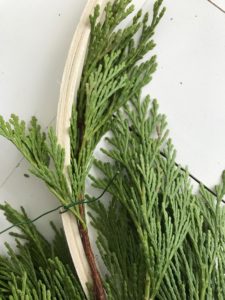

Once the wire was in place, I fanned out the greens over the wire so you couldn’t see it.

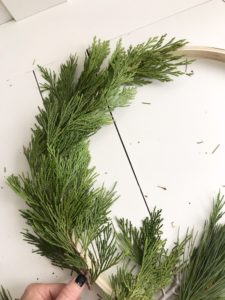
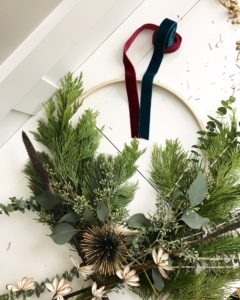
And just keep at it – fastening your greens with the wire. If you make a mistake? SO easy to correct. Either take the wire off completely and start again; or add a few extra greens to cover up a “problem area”. Once I had all my greens on my hoop, I added my little antique gold starburst embellishment – so fun! Such a cute little focal point. I also just used floral wire to fasten this on securely, nice and snug.

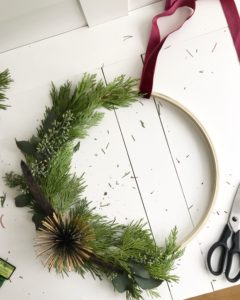
Drum Roll
Ladies and gentlemen…I give you Tara’s first asymmetrical minimalist winter hoop wreath! (That’s a mouthful!)

So much fun to make…and all under an hour’s time. Helpful hint: to keep the wreath fresh a bit longer, spray with water once a day.
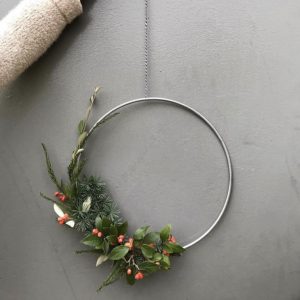
And right below here is a sneak peek at what I’m making next…

Sooooo, to feed my wreath making obsession even further, I’m having a few girlfriends over in December and we are having ourselves a wreath making party! I can’t wait to see what we all create! I’m grateful for my friends that are are down for holiday crafting as much as I am – thanks girls!!