If Laura Ingalls Decided To Make A Wreath Today

Adult-ing is hard, and sometimes at the end of the day, there’s so much to take in and absorb. But, there are also many things that still put a smile on your face. I’d like to keep posts light and fun, so I’m sharing one of my favorite creative outlets that makes me smile – making a wreath!

I love the sweet, organic touch of a nice wreath within my home. It makes me happy, and just feel good about my space. The other day, I just made one at home – and you can too. I’m going to talk you through creating your own lovely homemade wreath using everything from your backyard and basement. We are talking free and accessible materials here. And better yet? You can be done your project well within the hour – how’s that for some instant gratification? This just might be the creative outlet you are craving right now, so here we go!
Step 1. Gathering Branches For That Grapevine Look
In my backyard , we don’t have grapes growing, but by God, we have quite an assortment of vines and bendable little branches growing wild near the woods. Since it’s Spring, I needed to prune back and tame all of this growth, so it worked out well to keep a bunch for my wreath. I grabbed a handful and set them aside.

Step 2. Gather Greens
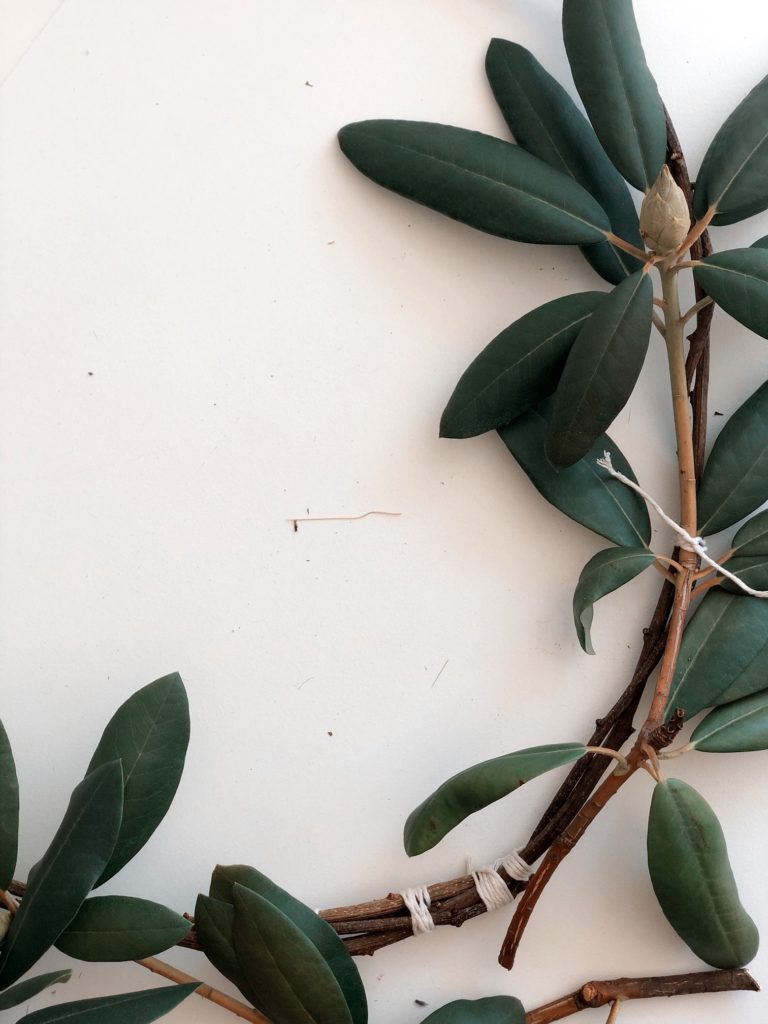
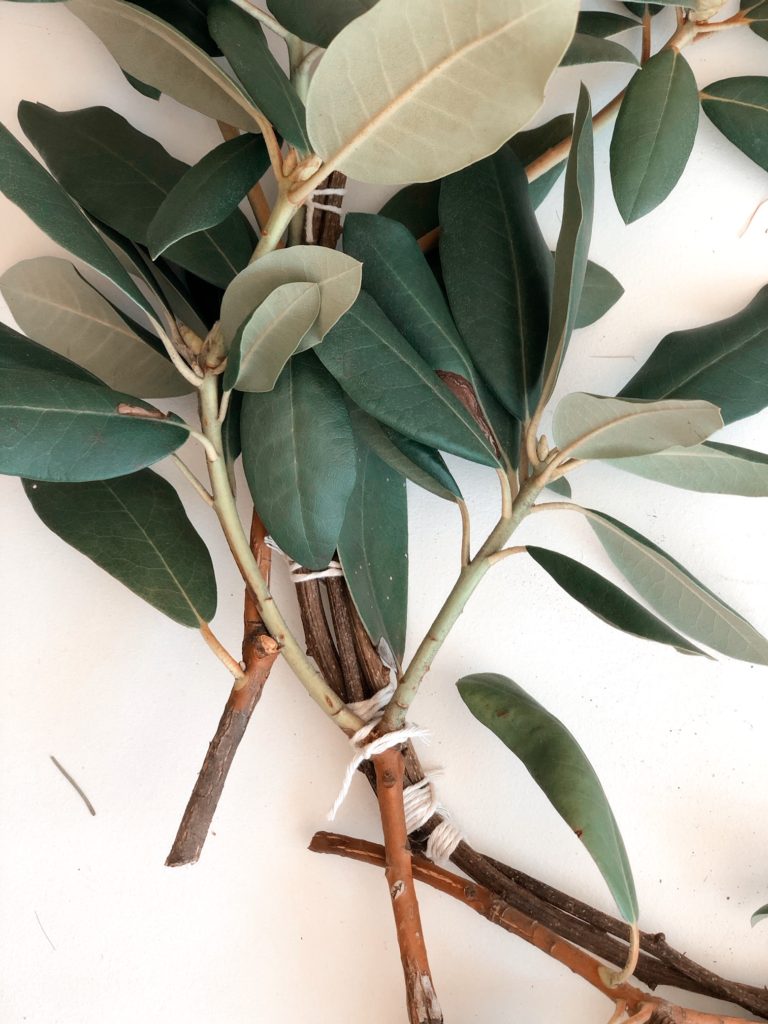
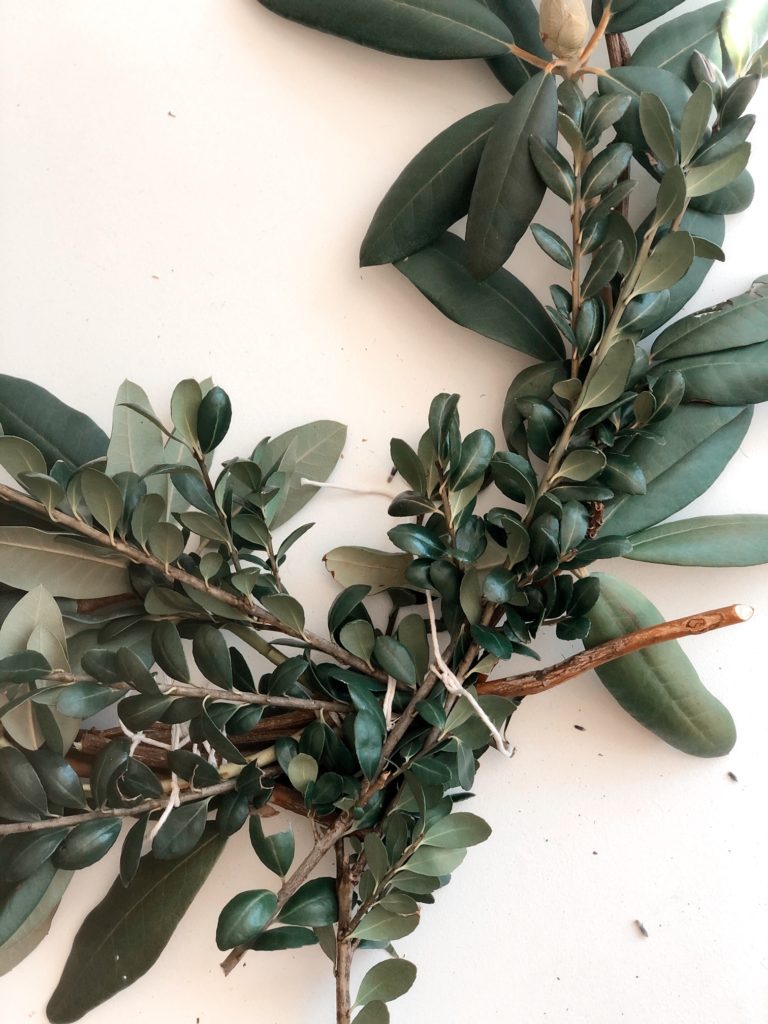
I definitely wanted some beautiful greens with waxy coated leaves in my wreath. I looked around for shrubs and plants that stay green throughout the winter. These plants are heartier, and when I cut the stems, they will stay fresh much longer on my wreath. I went with cutting a few boxwood and rhododendron stems – I liked how different they are in appearance, it really adds nice depth and dimension to the overall look.
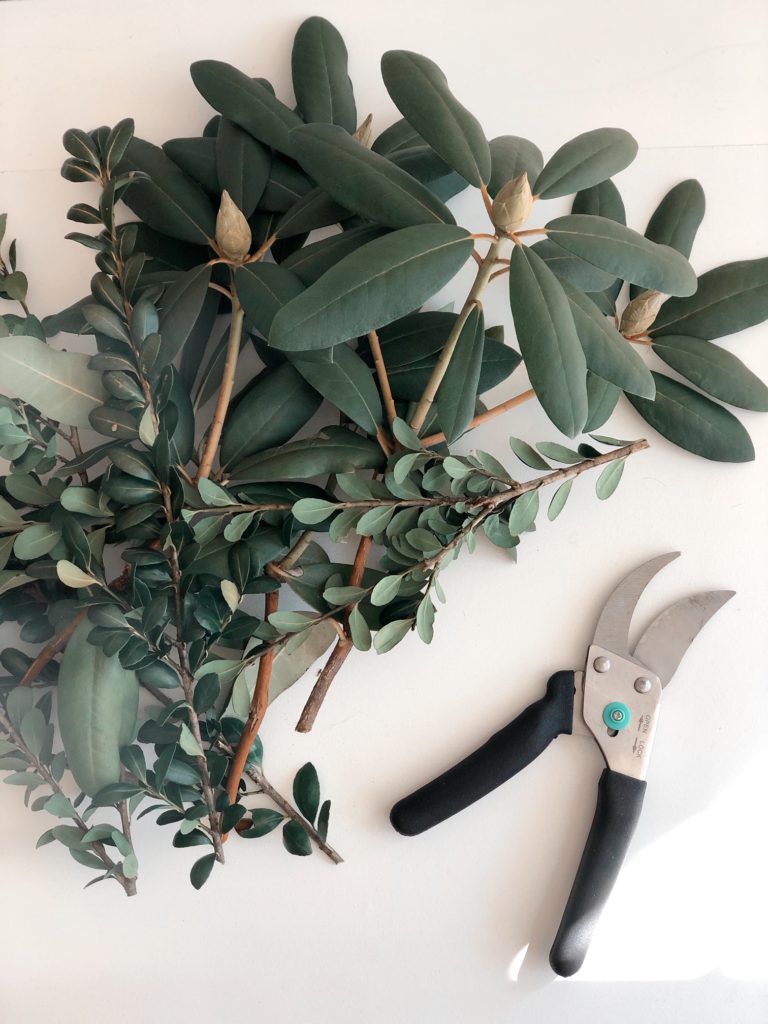
I then had a very nice assortment of greens to use. Once I had my greens and branches, I just needed a couple more things.
Step 3. Head To Your Basement For Embellishments
Sometimes basements (or storage bins) are a gold mine. I remembered I had a handful of old dried flowers I used years ago.
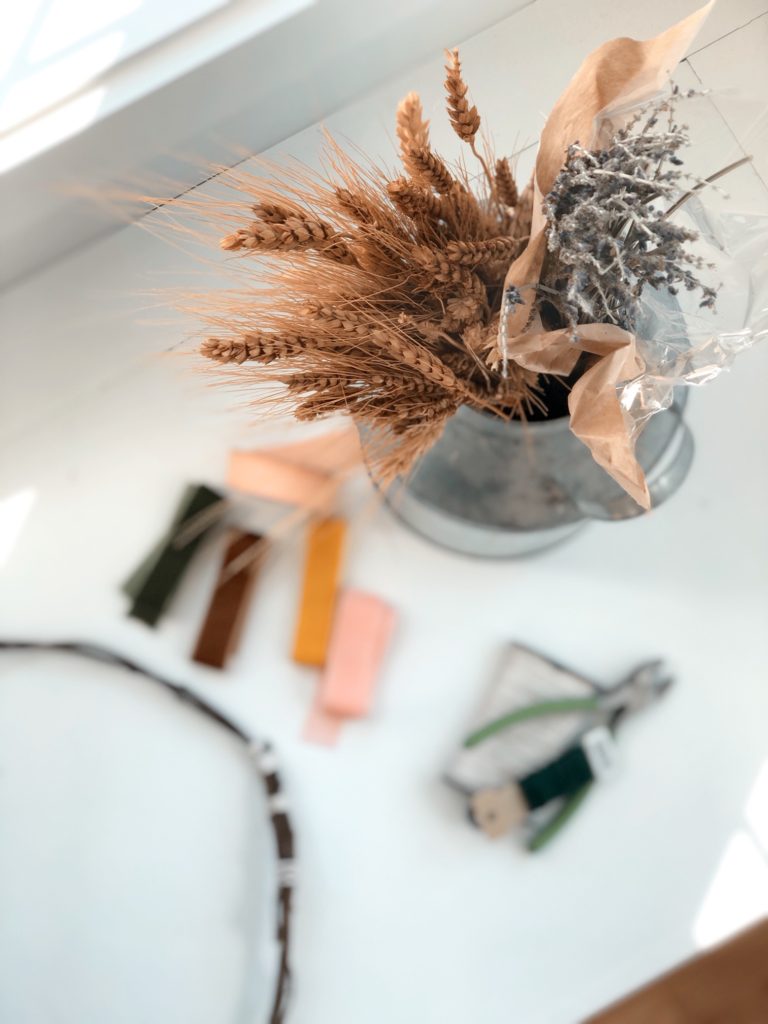
I somehow found them right where I left them years ago in the basement and grabbed them. I also grabbed a handful of fun spring colored ribbons. Sometimes you never know what you have from years ago – go ahead a take a peek in those junk drawers.
Step 4. Prep Your Work Station
I used a little corner of my house to work and create.
I brought all my gathered materials there, and I made sure I had basic string, scissors, and cutters handy. I opted for string because 1) I thought it added a more organic and “old fashioned” look, and 2) Sometimes its so much easier to work with string rather than floral wire when attaching greens and embellishments.
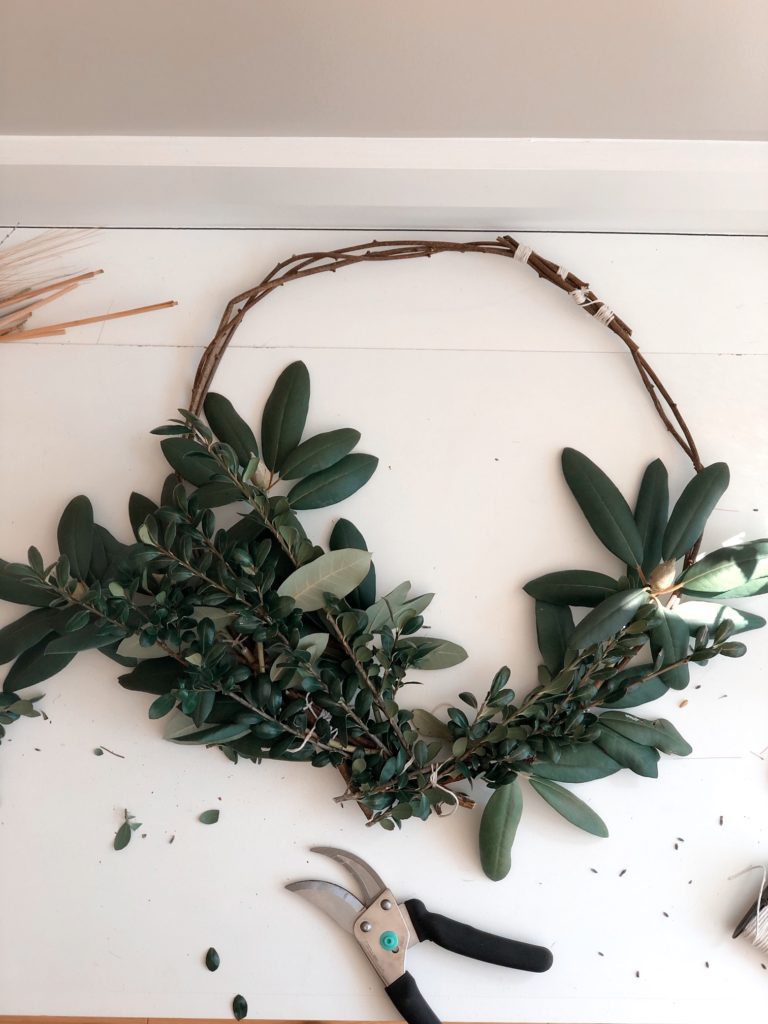
Step 5. Make Your Wreath Base
This is so much easier than you think. I simply took my branches and started to twist them together and shape them into a circle.
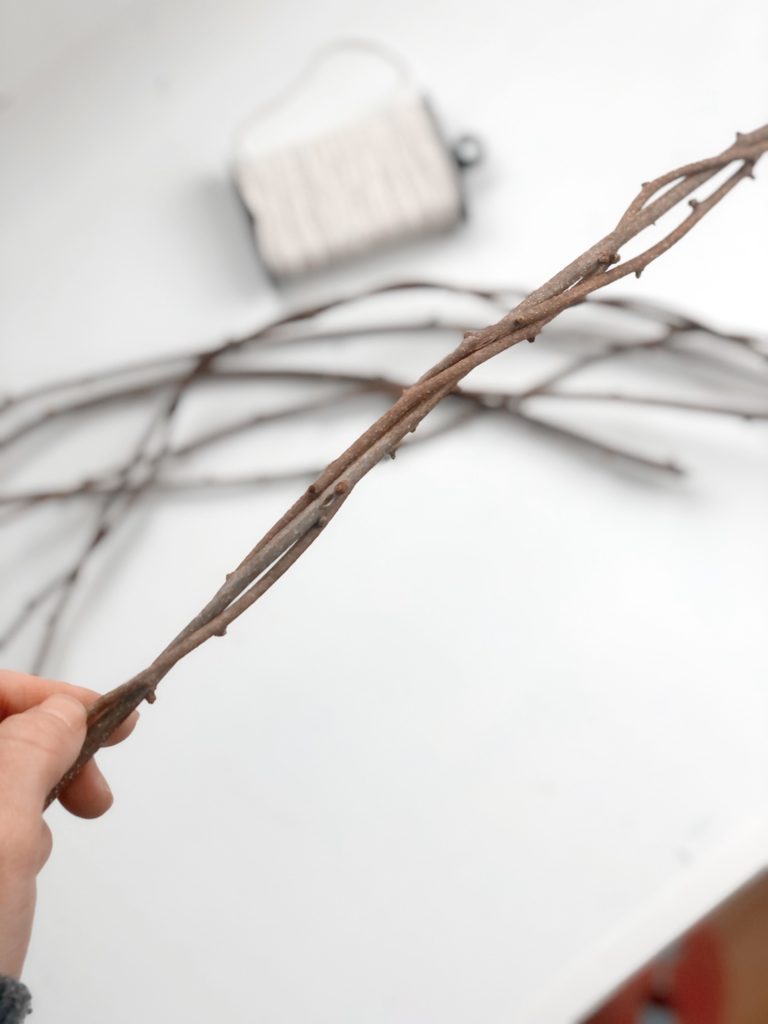
I used my string to fasten the circular shape together.
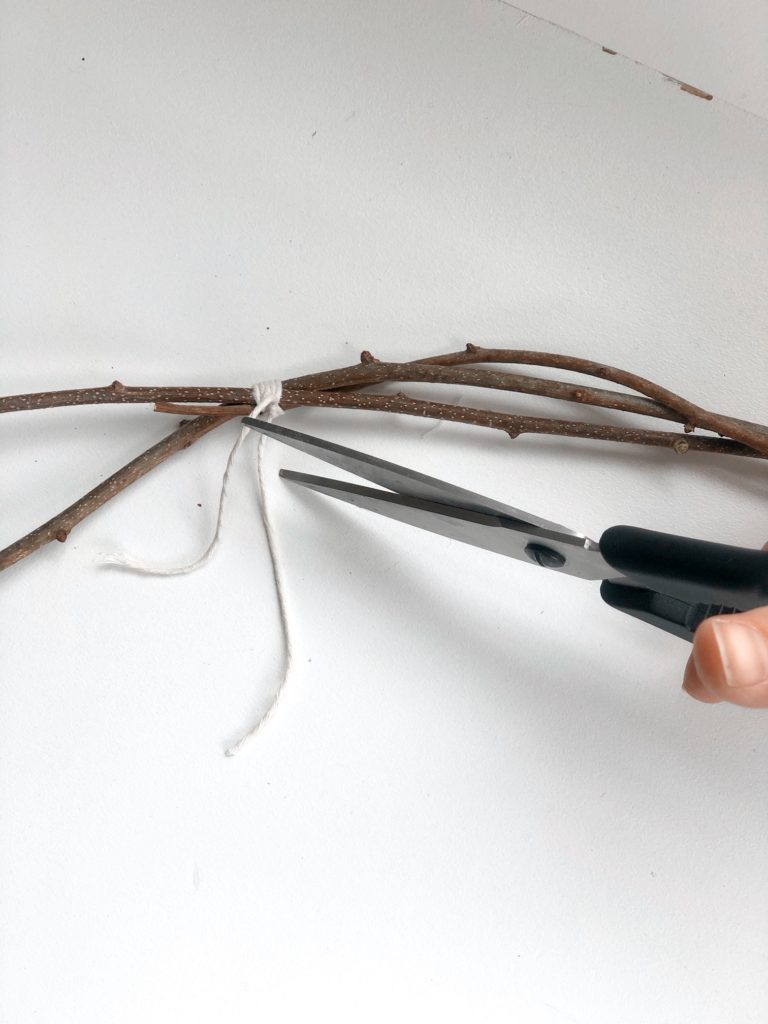

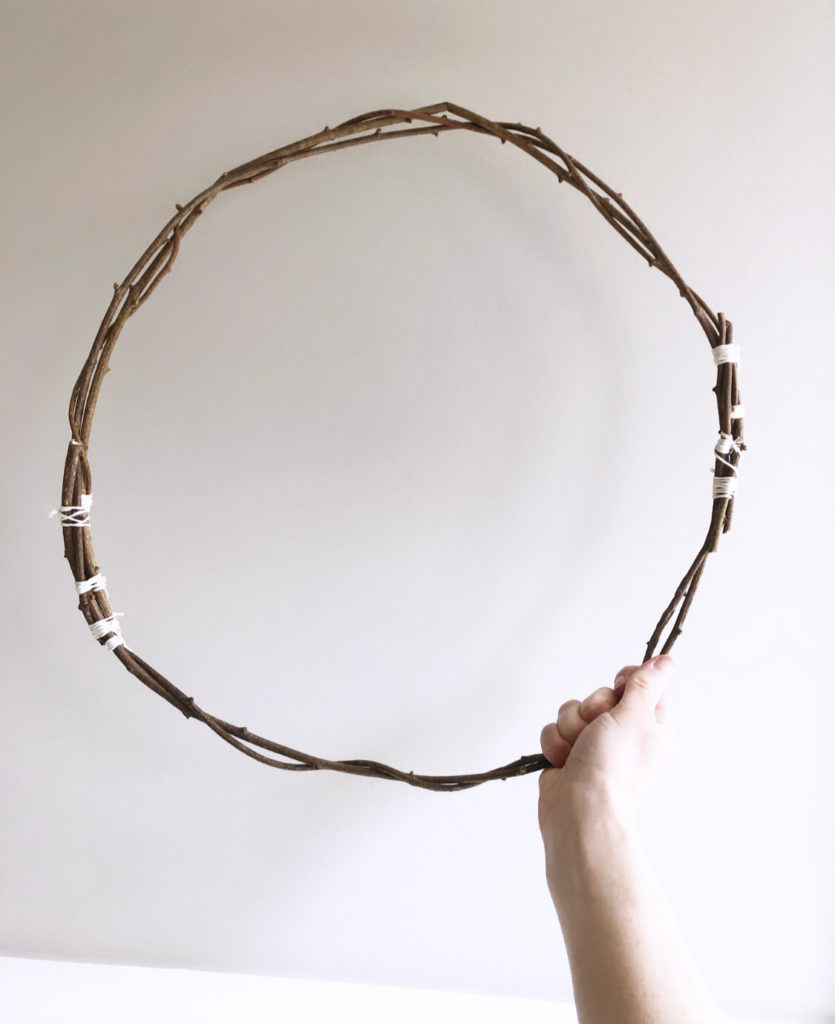
Literally that’s it. Then comes the fun part!
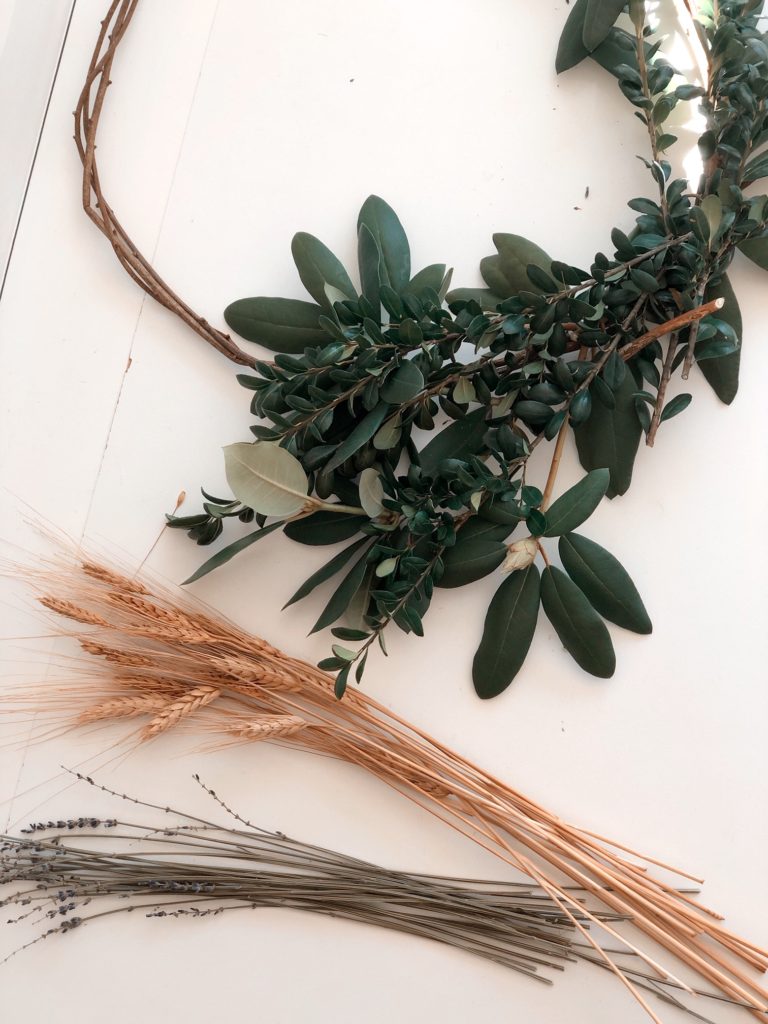
Step 6. The Fun Part!
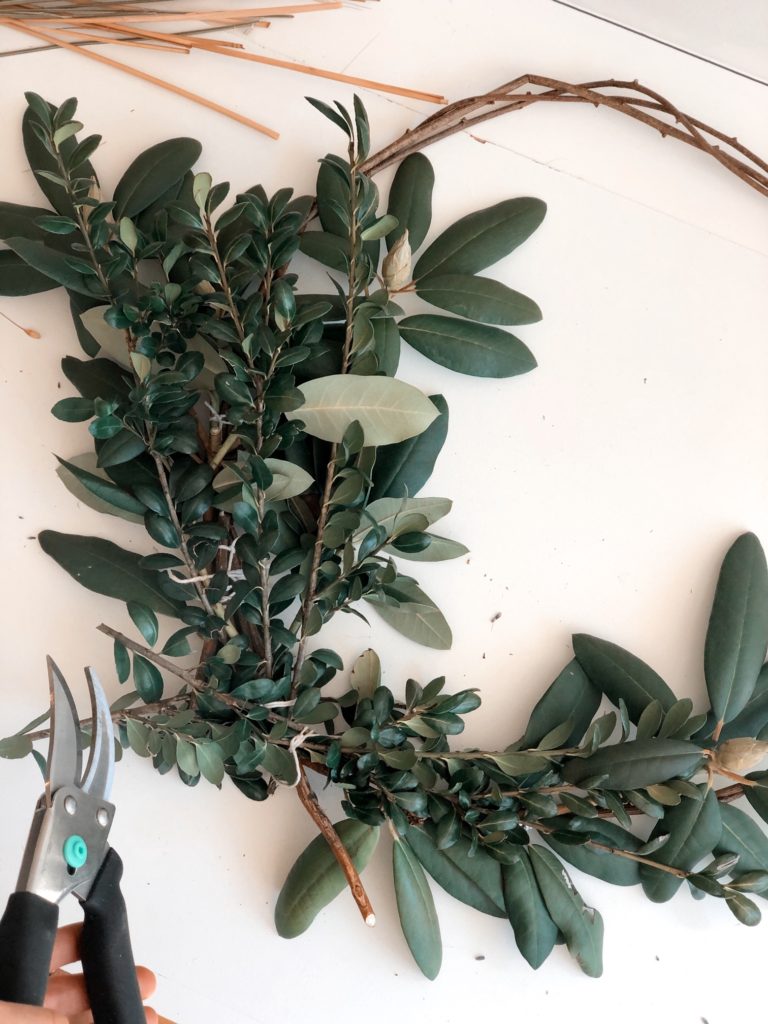
It’s time to layout your wreath with greens and dried flower embellishments. I like to place each piece roughly where I’d like it to be, and just play around with the placement until I think it’s the look I want.
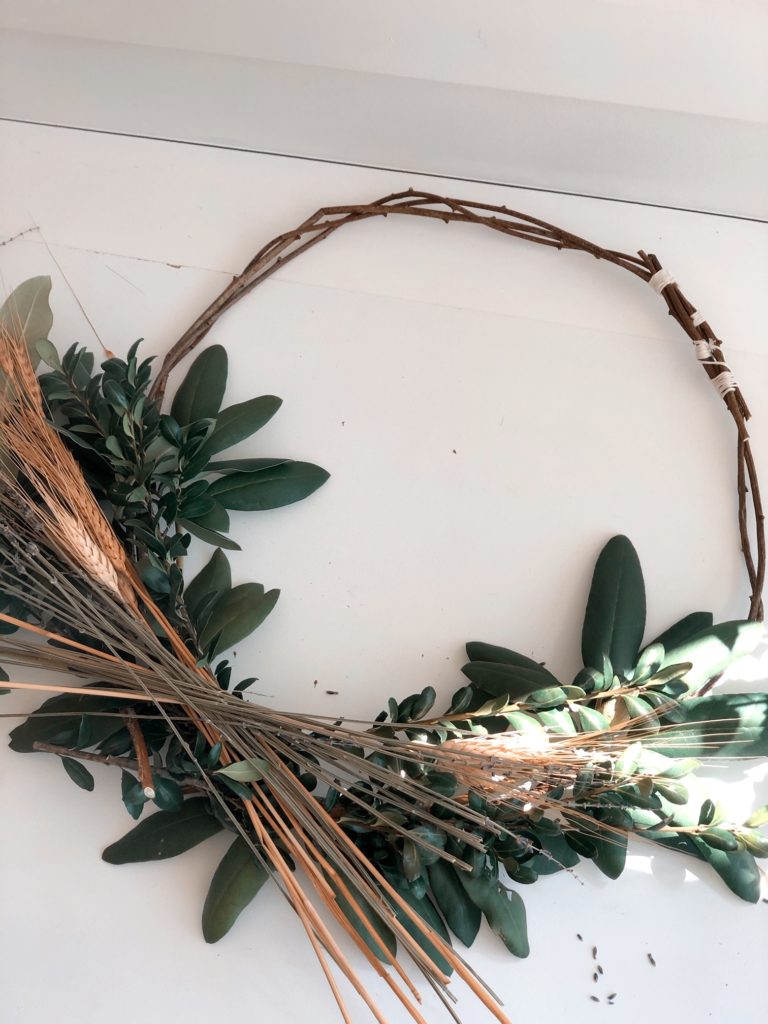

Once I have my layout design, I slowly start to fasten each piece to my wreath base with my string.
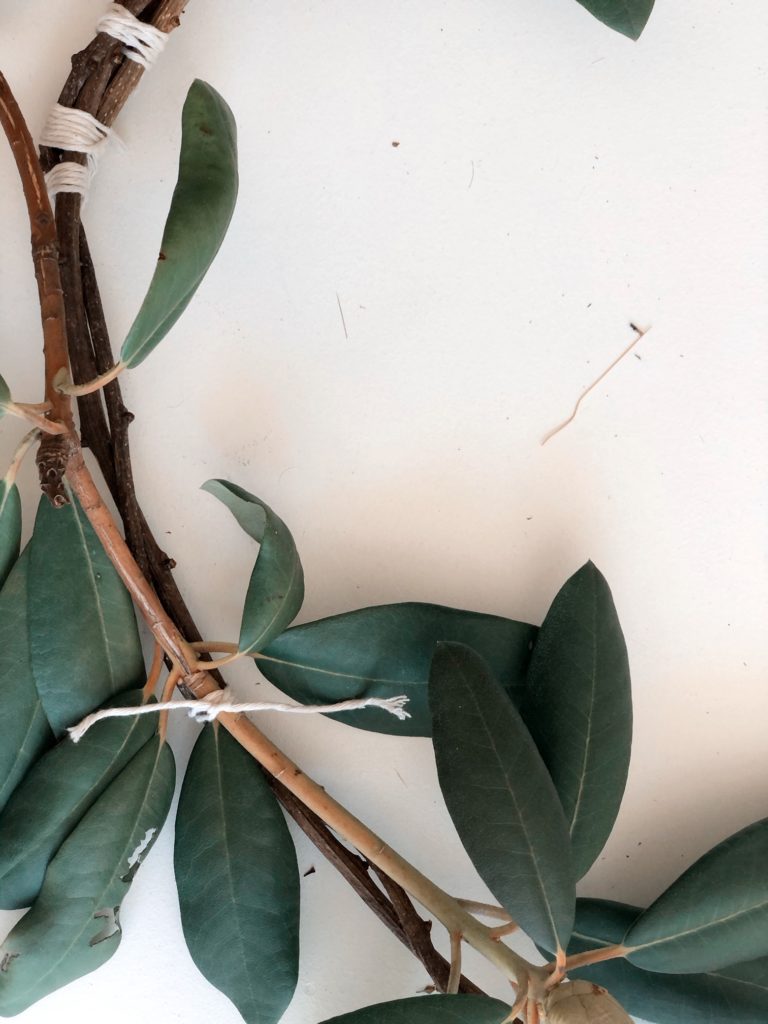
Once everything is fastened, I trimmed off what is extra and not needed for the overall look I wanted.

And last but not least…I added a pretty spring colored ribbon.

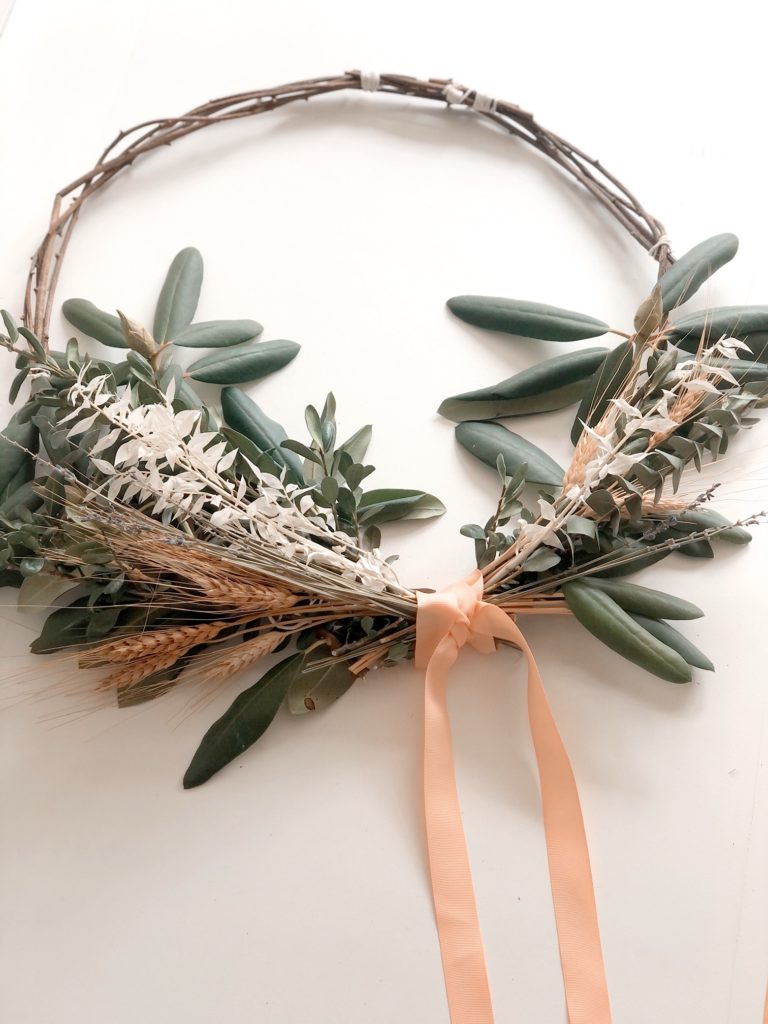
I personally love the asymmetrical look of wreaths and I knew that’s what I was going for, so at the end, I made sure my ribbon accentuated that by placing it off to the side. (And I added a touch of more dried flowers to my wreath just for fun!).
Step 7. Voila!
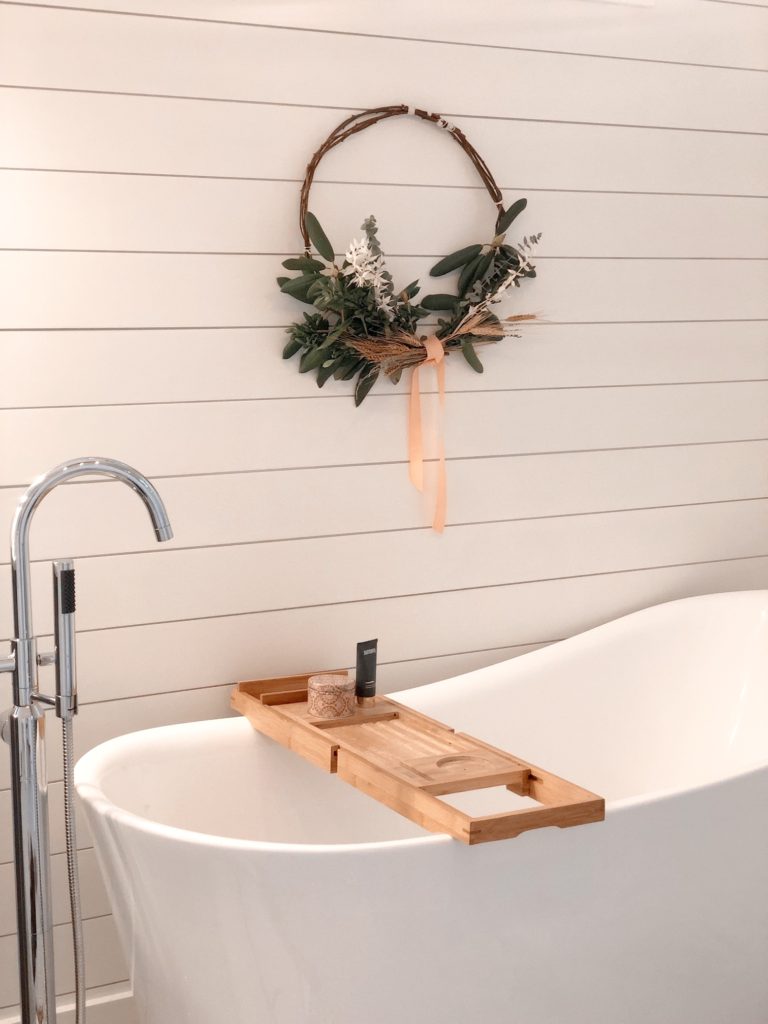
Your wreath is ready to be displayed! To keep it fresh a bit longer, you can spray the leaves every couple of days with a little spray bottle. I ended up placing my loveliness above the bath so I could enjoy its pretty serenity during a relaxing soak.
And who knows, maybe I’ll make another wreath for my front door soon.
I hope you enjoyed this post and can’t wait to hear how yours turns out! Take care!